
After replacing the zip ties with a bead of thickened epoxy, I started to work on fitting the rear and front bulkheads. However, I found that the boat was still floppy enough that it was shifting more than I’d like. That made it difficult to confirm that the bulkheads were right. So I decided I needed to start making the overall structure even more rigid. To that end, I decided I’d work from the back of the boat to the front and start by gluing in the transom which at this point was being held by a few temporary screws.
No Bevels. Just Glue.
So one of the interesting things about the boat is that there are no bevels anywhere. In more traditional boatbuilding, the transom edges would be beveled where they meet the sides and bottom so they meet squarely.
But this is stitch and glue construction and epoxy is our friend. The gaps left by the lack of bevels are simply filled with thickened epoxy. Given the epoxy is stronger than the surrounding wood, that works out well.

Transom Glued in with Straight Epoxy
The first step was to make sure the contact points on the transom were coated in epoxy. This is done for two reasons. First, we want to seal the end grain as this is where wood, even plywood, will do its best at sucking up water. We don’t want that. Second, we want to ensure a solid bond with its mating surfaces. We don’t want one surface starving another for epoxy so we also coat the sides and bottom where surfaces meet. A chip brush works well for this.
Once I finished applying straight epoxy, I placed the transom back in position and used the temporary screws to pull it back into its original positioning.
Fill the Gaps with Thickened Epoxy
I mixed up a batch of Raka Epoxy and thickened it with wood flour and cabosil. I’ve been using something close to Hank Bravo’s suggested 2 parts wood flour to 1 part cabosil. Although to get the last bit of that peanut butter consistency we need, I shift to a bit more cabosil.
The only thing that troubled me was making sure I got those 1.5″ gaps (the thickness of the transom) filled but that was easy enough. I started on one edge and used a plastic spreader to press thickened epoxy into a spot. Once it started to bulge, I moved to another spot and repeated the process. Eventually, it starts to come out in previous areas and that’s fine. Just press it and move it down the unfilled gaps until you’re done.
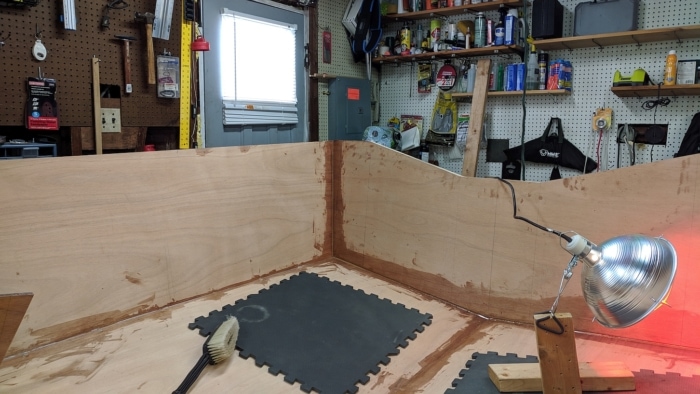
Fillet and Tape the Transom
Once the gap filling epoxy set, it was time for fillets and tape. I used a trick I learned from The Gougeon Brothers on Boat Construction for spreading the fillet with a plastic spreader. Start by cutting a 75-degree angle on a short side of the plastic spreader. Then cut that same side with the radius you wish to use. If you use enough thickened epoxy – I piled a bunch in a corner – you can then drag the tool across and create a smooth fillet in a single pass. Done correctly, it also does a nice job of leaving a neat margin around the fillet which helps reduce the mess waiting to happen that is thickened epoxy.
Next Steps
Glue in the front and rear bulkheads.