
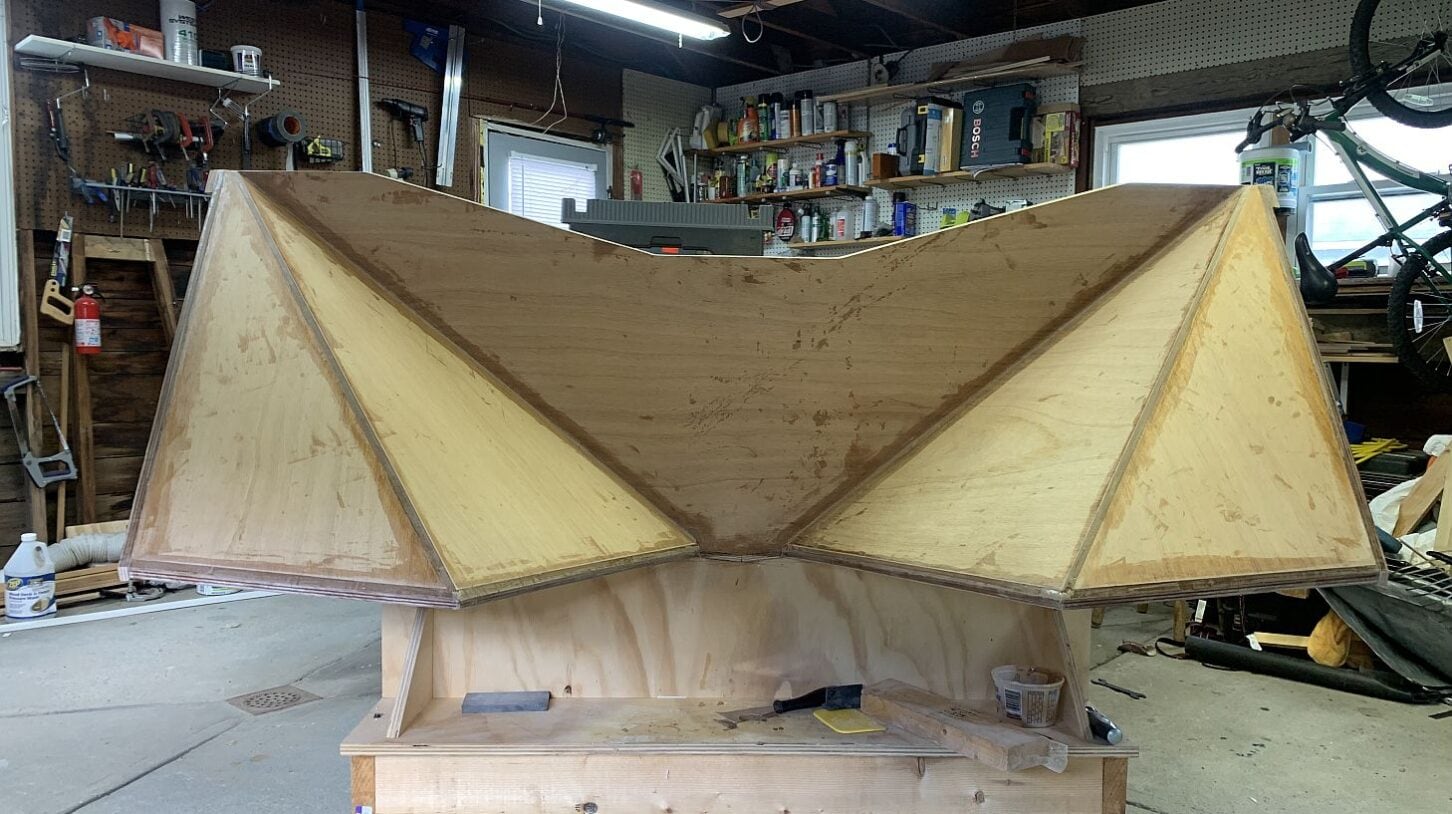
The Tango Skiff’s transom extensions or sponsons are its defining visual element but also provide a function. Hank Bravo came up with them to get his low power boats on plane faster while reducing the squat associated with initial acceleration.
Early in my build, I had considered turning these into swim steps but I also wanted to maintain the aesthetic elements. After several mock ups, I stuck with the original design.
Assembling the Transom Extensions
Two panels are joined to create each extension. And while not called out in the plans, I decided to join the inside of each with an epoxy fillet. To get the right angle, I test fit them and used packing tape to hold them in position. Then, I tack glued these together. Later, I removed them, and applied a fillet and tape.
Installation
Next, I applied two coats of epoxy to the areas of the transom area the extensions would cover.
With the second coat still wet, I used packing tape to hold the extension panels in position while I applied thickened epoxy where these met. The wet epoxy made things very slippery and a bit frustrating.
Bevels aren’t part of the Tango’s build approach which meant there were gaps to fill with thickened epoxy where these meet the transom areas. This is easier to see in the photo below but I filled the gaps in several passes. The final coat was close to a
Sanding was next. Where the panels stood proud, I sanded them to match the lines of the side. Where the panels were shy of the sides, I filled the areas with a bit of thickened epoxy.
Stress Under Fiberglass
This was my first attempt at applying fiberglass with a single sheet of fiberglass across a large area. The anticipation of possibly ruining it made it the most stressful step to date.
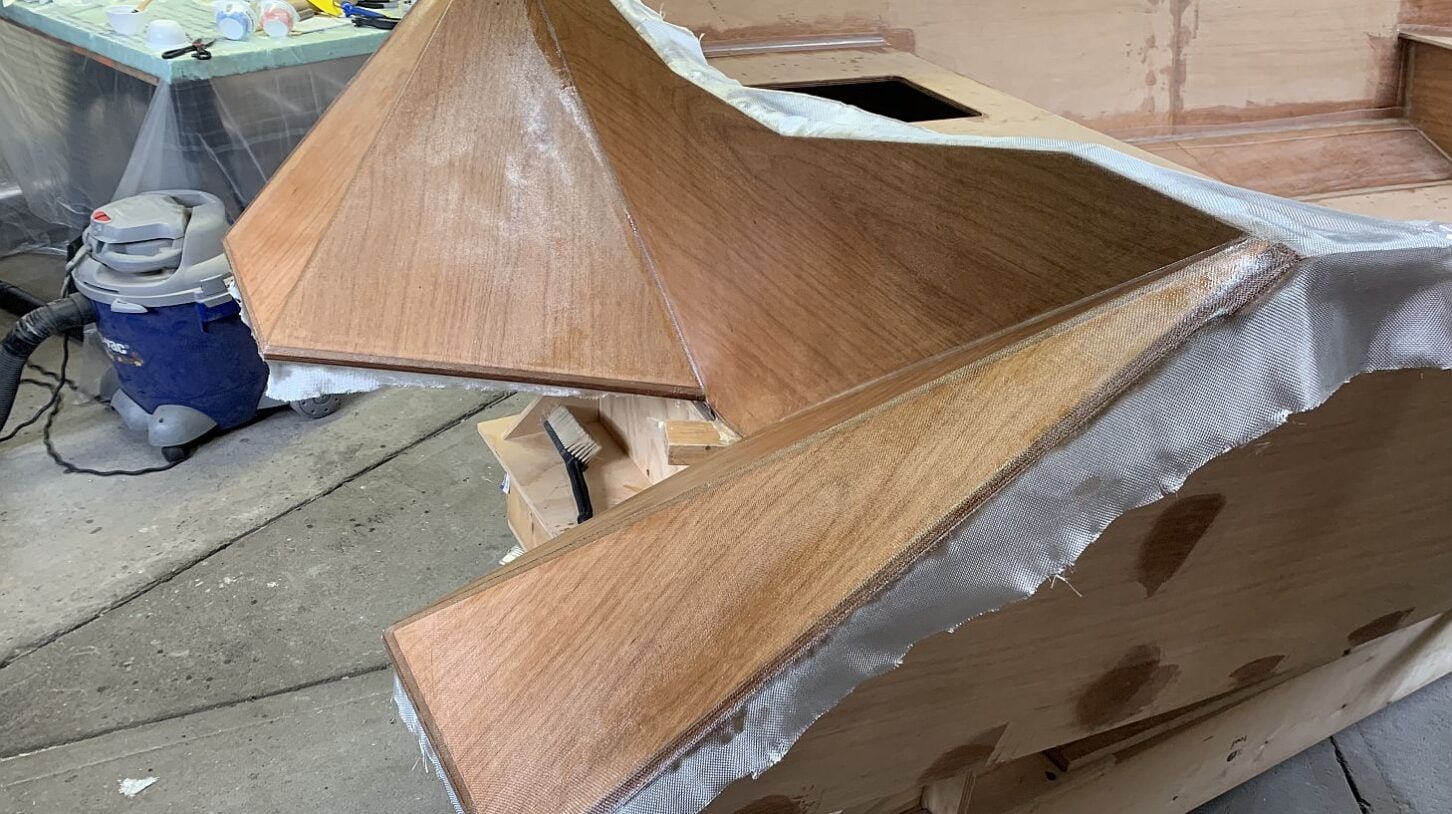
I estimated how much fiberglass by taking the measurements along the base of the transom area following the extensions.
Then I had to position the sheet which began by centering it and pinning the top edge to the transom.
I wet out the fiberglass with small batches of epoxy. Starting at the top corner, I targeted a small section at a time, using a plastic spreader and a foam roller.
Working a small area at a time made the whole process far less stressful than I anticipated. It gave me plenty of time to wet out an area, smooth out the wet fiberglass and then mix up the next small batch and repeat.